Presentation Instructions (toggle links below to view content)
Oral Presentation Instructions
Projectors and Microsoft Windows-based laptops with Microsoft Office will be provided at the Symposium. Please bring your PC-compatible presentation on a thumb drive/jump drive to plug into a USB port at registration.
The maximum time available for presentation and questions is 15 minutes per presenter. Your presentation time may be slightly shorter depending on the number of presenters in your session (max is 6).
We encourage you to follow general best practices for slide presentation development, for example:
The maximum time available for presentation and questions is 15 minutes per presenter. Your presentation time may be slightly shorter depending on the number of presenters in your session (max is 6).
We encourage you to follow general best practices for slide presentation development, for example:
- Create an initial slide that summarizes the content of your talk.
- Items should be bulleted, not full sentences.
- Font size should range from 28 to 32 points.
- Do not put text in the bottom ¼.
- Sans serif fonts like Arial or Helvetica are easier to read when projected.
- Avoid using all uppercase letters: it requires more time to read.
- Whenever possible, present data using bar charts or graphs instead of tables.
- Illustrate major points or trends, not detailed data.
- Use the minimum number of words possible in titles, subtitles, and captions.
- Creating an Effective Powerpoint Presentation (George Mason University)
- Design- Top ten slide tips (Garr Reynolds)
- Tips for creating and delivering an effective presentation (Office support)
- Presentation Style Guide (ProjectionNet)
Poster Instructions

- Each presenter will be provided with a poster panel with a useable work area of 1.47m high x 1.77m wide (410 high x 510 wide)
- You will be expected to spend one hour presenting your poster to conference attendees.
- We will send an email to you with:
- Your poster number
- Times to set up and take down your poster
- Your presentation time slot
- If you are a student participating in the poster competition, we will send a copy of the judging form to you.
- You will be provided with 10 push pins.
- Each poster panel will have the poster number in the lower right-hand corner.
- We suggest posting your contact information for those want to contact you outside of your appointment time to discuss your research.
- Sound/projection equipment or free-standing displays cannot be accommodated.
- Your poster should cover the same material as your submitted abstract.
- Place the title of your poster prominently at the top, with authors names directly beneath.
- Highlight authors name, e-mail and address in case the viewer is interested in contacting them for more information.
- Highlight your title and subheadings with colors or colored lines (see Fig. 1 example)
- Headings and subheadings should be at least 25% larger than the main copy.
- Dont crowd too much information on the poster; concentrate on 2 - 3 main points.
- Minimize complete sentences and paragraphs.
- Prepare all diagrams or charts neatly and legibly in a size sufficient to be read at a distance of 2 meters.
- Paragraph and figure caption text should be at least 24-point font (0.9 cm height) and headers at least 36 point font (1.2 cm height).
- Use squares, rectangles, circles, etc. to group like ideas (see Fig. 1 example). Dont clutter your poster with too much text (see Fig. 2 example).
- A serif font (e.g. Times) is often easier for reading main text, and a non-serif font (e.g., Arial or Helvetica) is suggested for headers and figure labels.
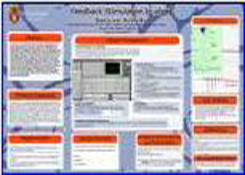 (Fig. 1) Good poster layout |
 (Fig. 2) Poster with too much text |

Copyright © University of Florida Water Institute, 570 Weil Hall, PO Box 116601, Gainesville, FL 32611-6601
Phone: 352.392.5893 Fax: 352.392.6855
Last Updated: <% Dim oFSO,oFile,dMod Set oFSO=Server.CreateObject("Scripting.FileSystemObject") 'BE SURE TO CHANGE THE NAME IN THE NEXT LINE!! Set oFile=oFSO.GetFile(Server.MapPath(Request.ServerVariables("PATH_INFO"))) dMod=oFile.DateLastModified Set oFSO=Nothing Set oFile=Nothing Response.Write dMod %>